Hot Rod Forum banner

T Bucket Build

50K views 138 replies 20 participants last post by  damnesia  
#1 · (Edited)
Building a T Bucket and rather excited. I thought I would post some details here in the hopes that perhaps I could get some advice when the time comes. I'm gonna go with an old meets new concept like the Phantom.
Image


I picked up my kit over the border in Niagara Falls, NY with no problems whatsoever.

Image


Image


It was a beautiful day to drive.

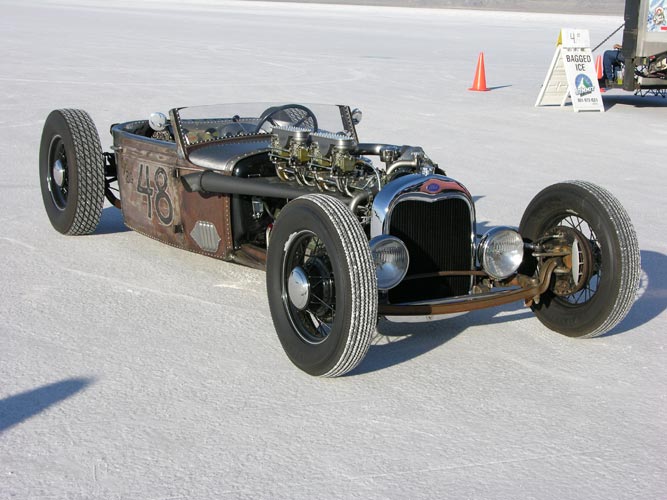
Over the weekend I did a mock up but couldn't go much further because I am still waiting for my drive line to arrive.

Image


I have just bought an all aluminum 4.6 DOHC, along with a transmission and aluminum IRS from a 1994 Lincoln MK8.

Image
 
#2 · (Edited)
IRS mods

A few years a go I saw a T bucket at the UVU College car show with neat looking tubular A arms for the Ford Irs, The guy said he was going to build kits but I have never seen anything since, nothing at last May UVU show and swap meet.
CTM engineering builds an installation kit to put the irs in early mustangs, I don't know if that can be made to work in a T bucket.
http://mustangirs.com/catalog/product_info.php?products_id=29
the truck kits have the springs too wide for looks in a T bucket
http://team321.com/truckirs/TEAM321TruckIRSInstall.html
 
#4 ·
Please keep a thread going on your progress. Those cars are about as much fun as you can have with your clothes on. The engine choice is great - As far as using that Lincoln IRS - it's the same unit a '90s T-Bird used and you may find that it is too big and clunky under a 'bucket without a bunch of work. A Jag, 'vette or even a Heidt's 9" adaptation might work better - but of course, that's your decision:D.

The '40s roadster racing video is frightening - roll bars??? Water pipe and what looked like steel bar. Safety harnesses and helmets - nahhhhh:pain:

Dave W
 
#5 ·
I will give you one bit of advise from my build 10 years ago. Blue Locktite everything. I spent the first few ride going out looking for parts that vibrated off. These cars due to their size and their design tend to vibrate things loose.

You will love it when you finish it.
 
#6 ·
t bucket build

The last 2 T bucket chassis I built I used the CCR plans, $ 20 at the time. You get patterns and numbers. I used the optical laser pattern plasma at the College and the parts were distorted for the Jag parts. I cut up the Jag cage and use them for drill templates. the Jag tie bars were on 2 pages. For the next jag I will use the CCr plans as a guide and carefully make my patterns using the dimensions they give and the cage pieces. If you google FREE T bucket plans you should find Ron's 23 pages of instructions,
http://freetbucketplans.com/
 
#17 · (Edited)
The drive train arrived this week. It came with the whole front end, so I spent most of today getting rid of it. The metal salvagers are gonna be happy. Also got rid of the A/C and Power Steering pumps. I am having a challenge with the passenger side exhaust bolts however and only got top half of the harnesses.

Image
BEFORE

Image

Image
AFTER

I still have to clean off all the grease and grime from 20 years of use. Decided to see how the mock up frame fits. So far all good.
 
#19 ·
After quite a bit for research, I think the setup below is how I'll start building the IRS frame. I have divided up the pieces into 3 categories. These are frame (grey), cage (green), and sway arms (red). After a few more measurements, I'll be able to start stripping rear end and build a jig.

Image
 
#21 ·
Gunk Off

I can't believe the gunk on this motor. Some places upto a 1/4 in ch thick. 3 rolls of disposable shop rags, a gallon biodegradable grease cleaner, and 3 days of scubbing......priceless.

Image


Image


I would love to be able to get some POR15 aluminum engine block paint on it before it gets too cold to work outside. Let's see how the weekend pans out.
 
#22 ·
Frame Mock Ups

Image


I thought that perhaps I was complete mocking up the frame. After I measured the height of the IRS pumpkin however, I realized that I need to raise the drive train up by a couple of inches in order to accommodate larger tires. This puts my transmission really high in the tub. I am hoping that it will work out but I think there will have to be some compromise between ride height and that of the drive train.
 
#23 ·
Machine Shop Day

Tomorrow it's off to the machine shop. I have collected all the parts to take at the same time.

Image


1: The hubs are seized to the axles and have to be pressed out
2: Knuckles need to be pressed from the hubs
3: Hubs need to be redrilled to 4.5
4: Manifold needs to be drilled at the EGR mount
5: Hubs need to be pressed back into the knuckles

While that's being done at the shop, I'll be able to clean the "pumpkin" and get it ready to mock it up on the frame.

Image


I should be able to have the frame done by around Christmas or so.
 
#25 ·
Mock Up Continues

Today, I cut the tub so that I am able to mount it on the frame to check the clearances.

Image

Image


I'll have to extend the bed by 10 inches. An Explorer IRS cover is on its way and I'll be able to finish the rear end mock up.

Image


I have shifted the engine and transmission off center towards the passenger side to align with rear end offset. It's not at all noticeable from the front.

Image


With the cold weather arriving soon. I am not sure how much I can get done but I am keeping my fingers crossed.
 
#26 · (Edited)
The best look for an early car in side view is to have the radiator in the middle of the tire. Cars that have the radiator ahead of the tire center look clunky. Cars that have the radiator behind the tire center look OK, but that image can be carried out to the extreme and look like a race car instead of a cruiser, like some of the radical SoCal VW's.

As an old buy who has been there, done that, I'm cautioning you not to finalize the frame length until you get the radiator in the center of the tire or just slightly behind the center of the tire in side view. You cannot do that until you get all the pieces and parts onto the front of the motor. The finalized wheelbase does not matter. My last T project had a 117" wheelbase so I could include a 429 Ford with all the factory equipment on the front of the motor.....18" steel fan, fan clutch, factory shroud, etc.

The large diameter headlights are ~9 inch or slightly larger commercial headlights and are available at many outlets. They're pretty pricey though. Here are some 9 1/2" units from Speedway for 280 bucks......then you have to buy stands and wire them.....
http://www.speedwaymotors.com/1934-...1934-Ford-Commercial-Headlights-12V-Halogen-Stock-9-1-2-Inch-Diameter,3026.html

In my opinion, the lights look best being even with the radiator or just slightly ahead of the radiator and about halfway up and down from the radiator. I don't like 'em mounted at the bottom of the radiator, but your tastes may vary.

Here's an example of the lights ahead of the radiator....
http://image.rodandcustommagazine.c...aturedvehicles/9439405+w195/0712rc_12_z+1925_ford_model_t+grille_headlights.jpg

And here's an example of the radiator mounted way out ahead of the centerline of the tires.....
http://bringatrailer.com/2013/10/02/period-built-1930-ford-5-window-hot-rod/
Looks clunky, don't you think?
 
#27 · (Edited)
Here's a rat with the tires mounted waaaaaay out front.....
Streets Of Denver: 1926 Ford Model T Rat Rod

Here's a realllllly sweet little roadster that proves you can push the tires way out there and still look good doin' it.......shortened '32 shell.....This car is bordering on being a Lakes Modified....beautifully done in my opinion....
http://www.rodandcustommagazine.com/featuredvehicles/1204rc_1927_ford_model_t/

Here are some Lakes Modified roadsters if you like that style of build.....
https://www.google.com/search?hl=en...1.img..10.21.1103.jVTl9YfVQVg#hl=en&q=Lakes+Modified+roadster&tbm=isch&imgdii=_

Here's a nice little Lakes car using a '28 Model A radiator shell (my personal favorite)......
http://www.barrett-jackson.com/application/onlinesubmission/lotdetails.aspx?ln=416.1&aid=53

Lakes car with '28 shell, commercial headlights....
http://www.flickriver.com/photos/13539555@N00/tags/lakesmodified/
(Scroll down to see the red car sitting on the salt....)